Virtual Postman Manual |
|
|
|
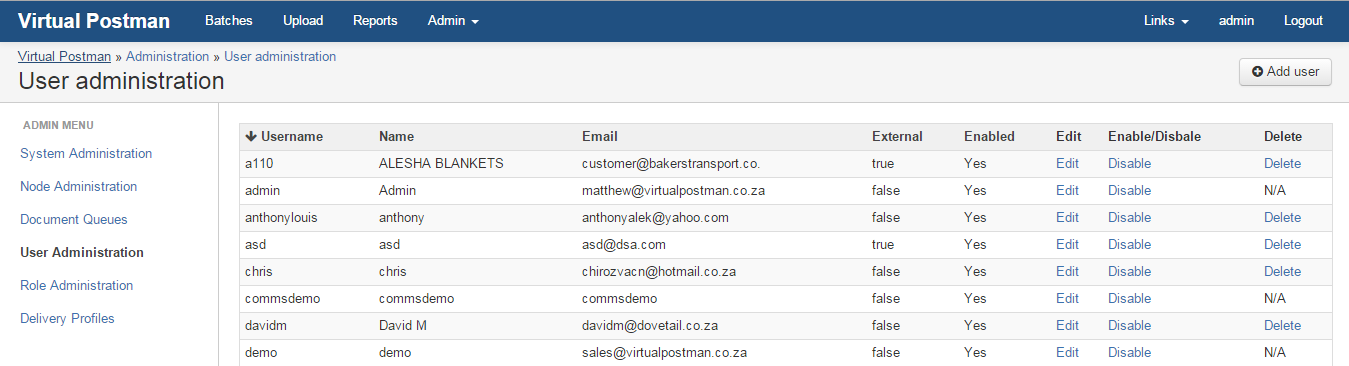
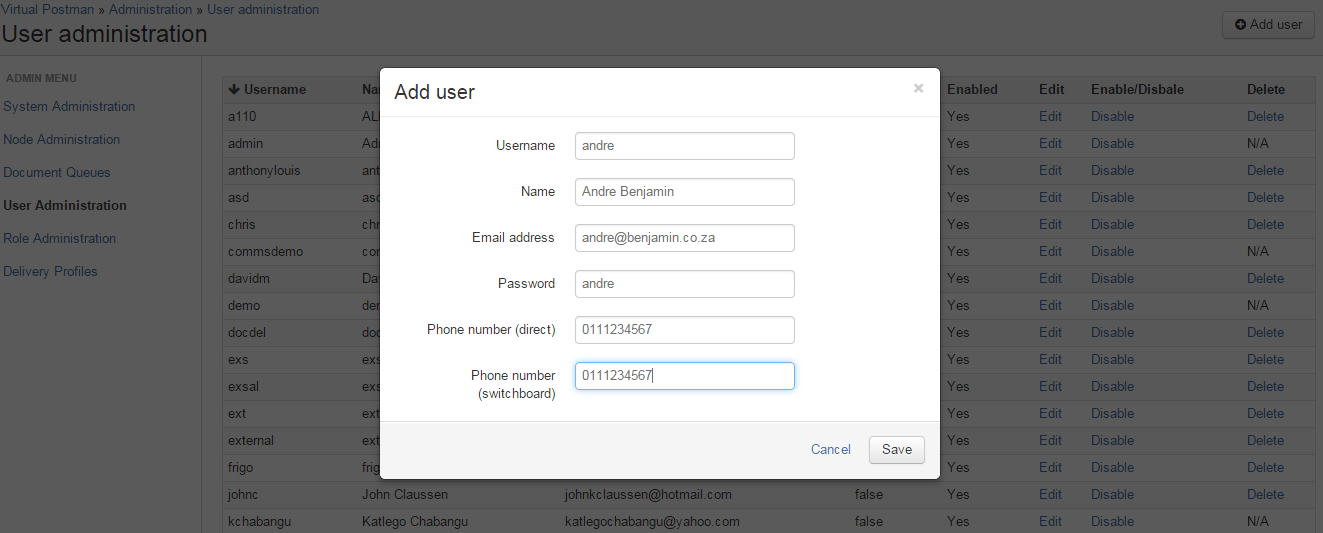
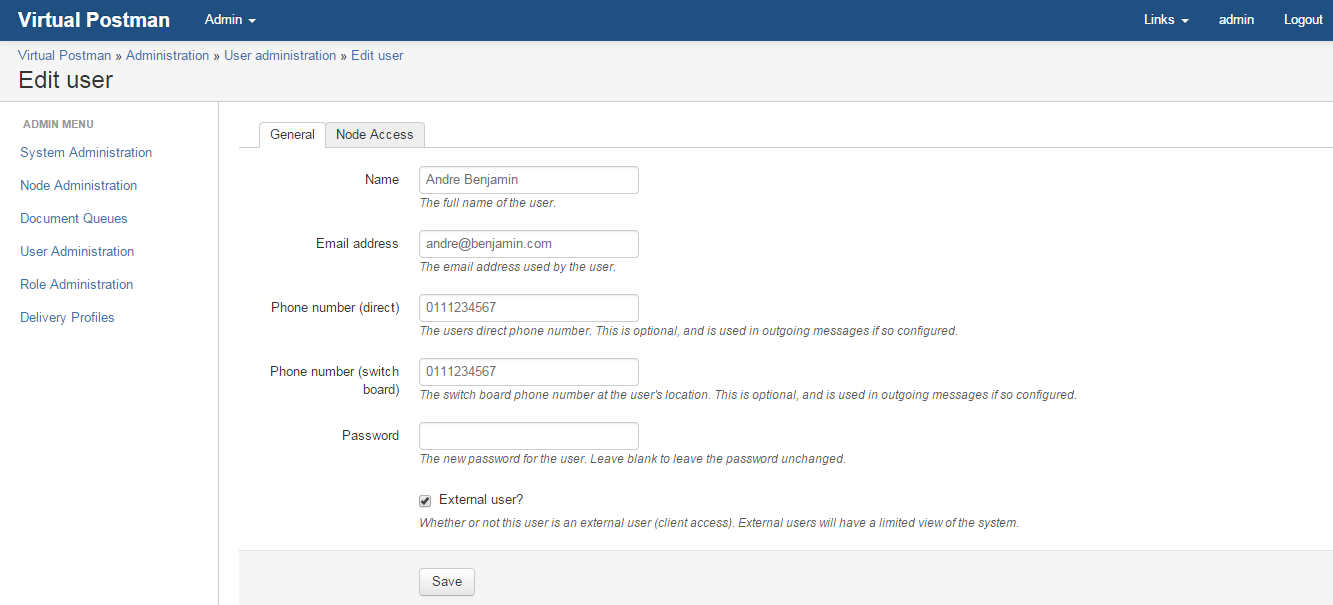
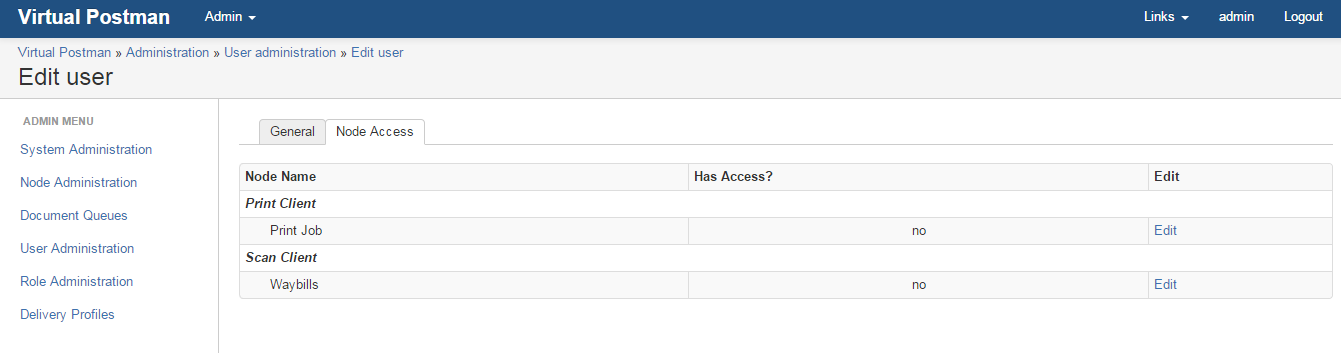
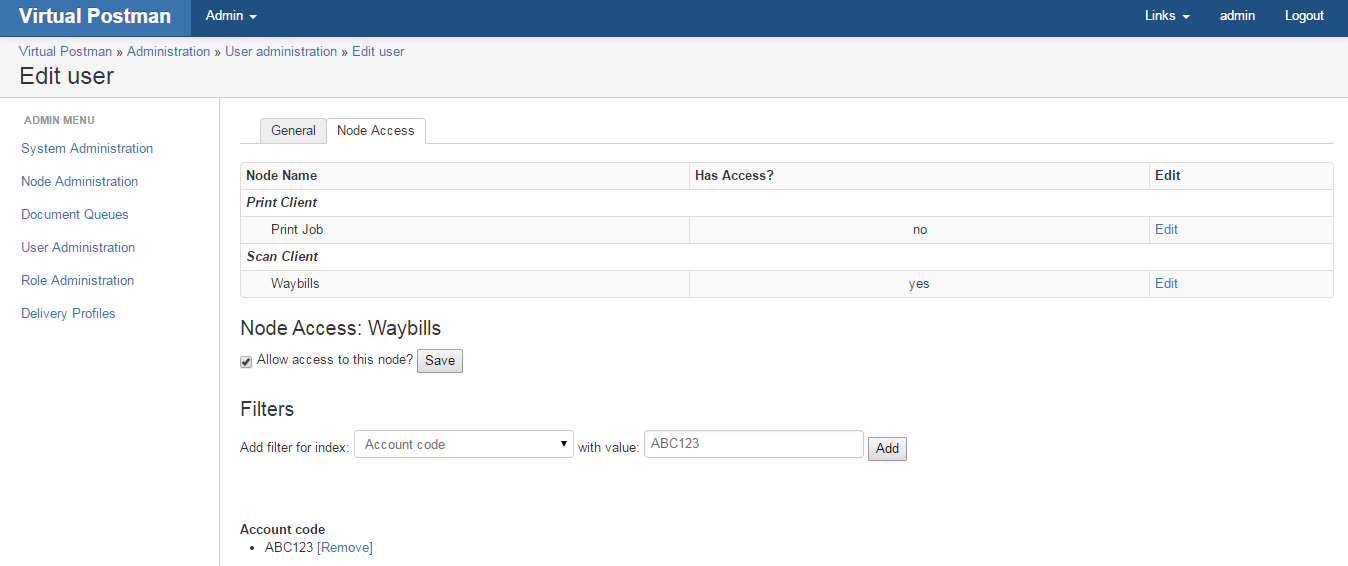
This chapter will cover how to create users and assign roles to users. This chapter will also cover how cover how to remove users, change user passwords, and set whether this will be an internal user or external user. To add a user on Virtual Postman, you click on Admin at the top of the page, then select User administration as shown in Figure 9.1, “Adding Users”. You then click "Add user" on the top right and screen will pop up where you will be required to insert four(4) mandatory fields, and two(2) optional fields. The mandatory fields required are the "Username", "Name", "Email address" and "Password" for the new user, and the optional fields are "Telephone number(direct)" and "Telephone number(switchboard)" for the user. After entering these details, you click the "Save" button and the user will be created as shown in Figure 9.2, “Creating a user”. Once you have created the user, you will be able to edit the users' settings and assign them a role if they are an internal user, or assign them permissions on a node and set up an index match if they are an external user. Internal users will be assigned roles, these roles will govern which document types the user will be able to see. To assign a role to an internal user you click on "Edit" in the user administration menu and click on the "Roles" tab and select the required role as shown in Figure 9.3, “Internal User Config” and click "Add". External users will be assigned node access, and under this node you will be able to set and index match. Index match sets that the user will only be able to view documents in that node that belong to a particular account number or numbers. You set up the external user by clicking "Edit" in the User Administration menu on the users entry, then click the "External user?" checkbox as shown in Figure 9.4, “External User Config” and click save. After clicking save, you will see that a "Node Access" tab will appear at the top, if you click on this tab you will have the option to select which nodes the user will have access to as shown in Figure 9.5, “Node Access Setup”. From here you can click "Edit" on the desired node, click on the "Allow access to this node?" checkbox, click the "Save" button, then click on the "Add filter for this node?" drop down, select an index to match and click what value must be macthed to the index as shown in Figure 9.6, “Node Access Setup” and click "Add". |