Virtual Postman Manual |
|
|
|
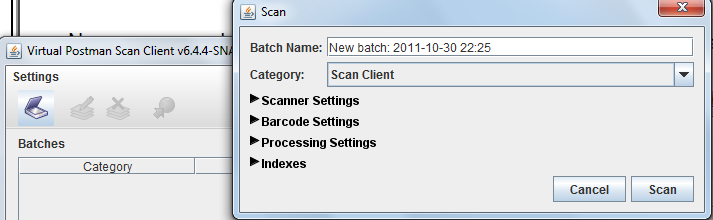
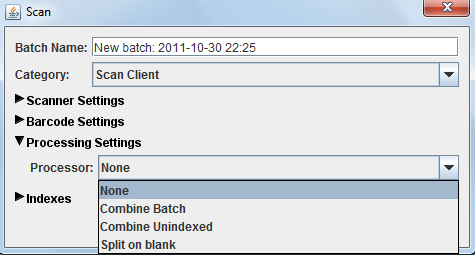
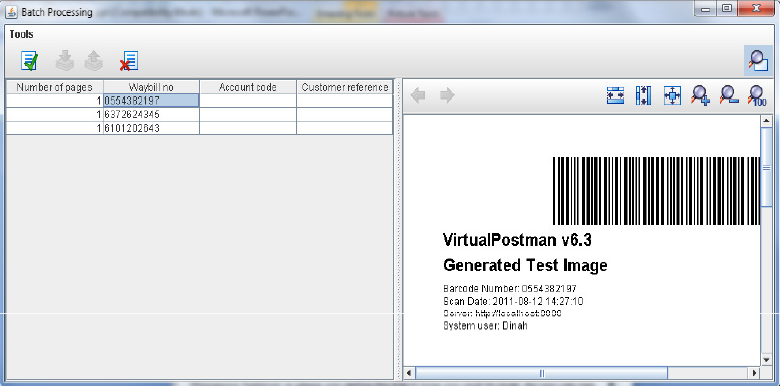
From our home screen, shown in ???, press the scanner icon at the top left of the home screen to bring up the scanning interface, as shown below in figure Figure 4.1, “Virtual Postman Scan Client Scanner Interface”. The batch name is giving to an entire batch of scanning (1 continues flow of documents in the scanner), and may be edited to suit your needs. There will always be a default unique batch name before you edit it. The Category is the location on the server(virtual postman) where your scans will be sent to once you have verified and uploaded. Click on "Processing Settings" to choose which type of batch processing you would like to perform, shown below in Figure 4.2, “Virtual Postman Scan Client Scanner Interface”. - None : this will not use any batch management process and all pages will be scanned individually. - Combine Batch : this will put all pages scanned in this instance into one multi-paged document - Combine Unindexed : this will put all unbarcoded pages following a barcoded page into one document as attachments to the barcoded page. - Split on blank : this will combine pages into one document until a blank page is scanned, and then create a new document. Click on the "Scan" button when you are ready to scan. Once all your documents have been scanned, all pages will be listed in a table on the left side of the scan Client, and clicking on an individual document will display a preview of that page on the right hand side, as show below in Figure 4.3, “Virtual Postman Scan Client After Scanning”. |